In today’s industry of rapidly-growing products, user experience (UX) design has become increasingly important. It’s clear that design-led companies outperform their competitors. Prototyping plays a vital role in the process of creating successful UX, but for many product teams, prototyping is still one of the most confusing parts of the UX design process. No wonder it’s unclear — a prototype can be almost anything, from a series of paper sketches representing the different screens or states of an app to a fully functional, pixel-perfect app.
In this article, I’ll provide answers to the following questions related to prototyping:
- What is a prototype and when do you need it?
- What is “prototype fidelity” and what is the difference between a low fidelity prototype and a high fidelity prototype?
- What techniques can be used to build prototypes?
What a prototype is, and what it isn’t
We often hear the term “prototype” in a lot of different contexts. Because of this, there might be confusion regarding its meaning.
In its basic form, a prototype is an expression of design intent. Prototyping allows designers to present their designs and see them in action. In the context of digital products, a prototype is a simulation of the final interaction between the user and the interface. Depending on what a product team needs a prototype to do, it can simulate a single interaction, a particular user flow or even an entire app.
A lot of people confuse prototypes with sketches, wireframes, and mockups. These assets are not prototypes. The idea of simulation (read, “interactivity”) is essential for prototypes. A person who interacts with a prototype should be able to see the response on their input (this response can be generated either by a human or a system). That’s why static assets — such as sketches, wireframes, and mockups — can’t be considered prototypes.
Why we need prototypes
The primary goal of building a prototype is to test designs (and product ideas) before creating real products. Your product’s success is directly related to whether you test it or not. Without any doubt, your design will be tested when the product becomes available on the market and people begin using it. If this is the first-ever testing, there’s a high likelihood of negative feedback from users. Therefore, it’s always better to collect feedback during the low-risk research phase, and before public release.
The following are two cases that require a prototype:
- Concept validation. Ensure the design concept works as intended. In most cases, it’s relatively easy to test a concept with real users. Once an interactive version of a product idea is in the hands of real users, a product team will be able to see how a target audience wants to use the product. Based on this feedback, it’s possible to adjust an initial concept.
- Usability testing. Determine if people are able to use a product. Prototyping is essential for finding and resolving usability issues before launch. Testing reveals areas that need improvement. That’s why so many product teams create prototypes, have users test them, and iterate the design until it’s good enough.
What is fidelity?
Prototypes don’t necessarily look like final products — they can have different fidelity. The fidelity of a prototype refers to how it conveys the look-and-feel of the final product (basically, its level of detail and realism).
Fidelity can vary in the areas of:
- Visual design
- Content
- Interactivity
There are many types of prototypes, ranging anywhere between these two extremes:
- Low fidelity prototype
- High fidelity prototype
Product teams choose a prototype’s fidelity based on the goals of prototyping, completeness of design, and available resources.
Low fidelity prototyping
Low fidelity (lo-fi) prototyping is a quick and easy way to translate high-level design concepts into tangible and testable artifacts. The first and most important role of low fidelity prototype is to check and test functionality rather than the visual appearance of the product.
Here are the basic characteristics of low fidelity prototyping:
- Visual design: Only some of the visual attributes of the final product are presented (such as shapes of elements, basic visual hierarchy, etc.).
- Content: Only key elements of the content are included.
- Interactivity: The prototype can be simulated by a real human. During a testing session, a particular person who is familiar with design acts as a computer and manually changes the design’s state in real-time. Interactivity can also be created from wireframes software, also known as “connected wireframes.” This type of prototype is basically wireframes linked to each other inside an application like PowerPoint or Keynote, or by using a special digital prototyping tool.
Pros
- Fast and inexpensive. Creating low fidelity prototype doesn’t cost much. Since the prototype is a bare-bones design, it doesn’t take much time to create one. It’s possible to create a lo-fi paper prototype in just five to ten minutes. This allows product teams to explore different ideas without too much effort.
- Collaborative. This type of prototyping stimulates group work. Since creation low fidelity prototype don’t require having special skills, more people can be involved in the design process. Even non-designers can play an active part in the idea-formulation process.
- Clarifying. Both team members and stakeholders will have a much clearer expectation about an upcoming project.
Cons
- Uncertainty during testing. With a low fidelity prototype, it might be hard for test participants to understand what is supposed to work and what isn’t. A low fidelity prototype requires a lot of imagination from the user, limiting the outcome of user testing.
- Limited interactivity. It’s impossible to convey complex animations or transitions using this type of prototype.
Popular techniques
Paper prototyping and clickable wireframes are two popular low fidelity prototyping techniques. Both techniques are focused on providing the fastest-possible way to iterate design ideas until both the project team and the stakeholders are happy with the basics.
Paper prototyping
Paper prototyping allows you to prototype a digital product interface without using digital software. The technique is based on creating hand drawings of different screens that represent user interfaces of a product. While this is a relatively simple technique, it can be useful when a product team needs to explore different ideas and refine designs quickly. This is especially true in the early stages of design when the team is trying different approaches.
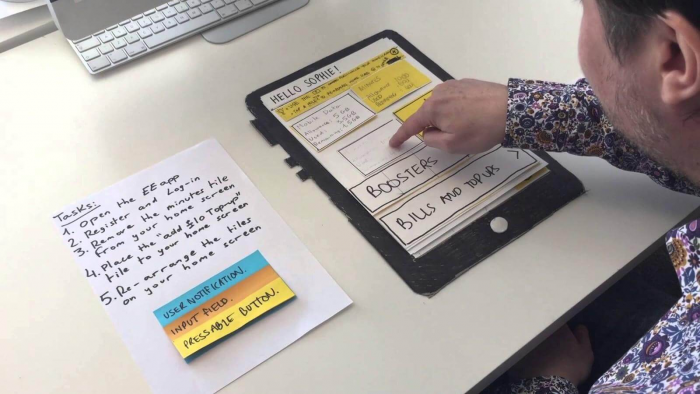
 Simple screens are drawn on paper. A common practice for testing these prototypes is to have one person play ‘computer,’ switching the sketches around according to user choices. Image by UX Playground.
The benefits of using this technique include:
- Leverage common design skills. Everyone can sketch (even those who say they can’t) and this means that everyone can build paper prototypes.
- Allow early testing. Testing prototypes early lets product teams find big-picture problems — such as unclear information architecture — before they become too difficult to handle.
- Support rapid experimentation. Different user interface elements can be drawn, cut out, copied to make extras, and then assembled on a new piece of paper. With paper prototypes, it’s also possible to mimic complex interactions, such as scrolling.
- Serve as documentation. Paper prototypes can be used as a reference for future iterations. Notes and revisions can be written either directly on the prototype or on sticky notes attached to the pages.
- Facilitate adjustments. Using paper prototypes, it’s possible to make changes right during the testing session. If designers need to add a change to the low fidelity prototype they can quickly sketch a response or erase part of the design.
If you want to use paper prototyping for usability testing it’s important to consider the natural limitations of this technique:
- An additional person is required to conduct the test session. You’ll need at least two people to conduct the test. One person will be the facilitator (who will act as a ‘computer’) that’s helping the test participant walk through the design and the other person will be actually testing the app.
- It’s hard to convey complicated operations. Paper prototypes are less suitable for visually-complex or highly-interactive interfaces.
Considering the advantages and disadvantages, it’s recommended to use paper prototyping during the early stages of design, when a project is still abstract or in the process of forming. The further the team gets into the design process, the more significant the gap between paper prototypes and the final product will be.
Clickable wireframes
A wireframe is a visual representation of a product page that the designer can use to arrange page elements. Wireframes can be used as a foundation for low fidelity prototypes. Clickable wireframes are the simplest form of interactive prototype — created by linking static wireframes together.
Just like paper prototypes, clickable wireframes often don’t look like the finished product, but they do have one significant advantage over paper prototypes — they don’t require a separate person to work as a facilitator during the testing session.
The benefits of using this technique include:
- Existing design deliverables can be reused. During a particular phase of the design process you’ll have wireframes or sketches that represent your product’s UI design. In most cases, it’s possible to use them to create a clickable flow.
- Layouts can be easily changed. Designers can easily adapt wireframes based on user feedback and repeat the testing process. With the right tool, it’s easy to create or modify click-through prototypes without spending a lot of extra time.
Low fidelity prototypes can be created using tools for presentation (such as PowerPoint or Keynote):
 By linking together different pages, you can create a very basic prototype in software like PowerPoint and Keynote. Image by 9to5mac.
They can also be created using tools made specifically for prototyping. Specialized web prototyping tools brings another important benefit—you can move from low fidelity to high fidelity prototype without switching the prototyping tool.
High fidelity prototyping
High fidelity (hi-fi) prototypes appear and function as similar as possible to the actual product that will ship. Teams usually create high fidelity prototypes when they have a solid understanding of what they are going to build and they need to either test it with real users or get final-design approval from stakeholders.
The basic characteristics of high fidelity prototype include:
- Visual design: Realistic and detailed design — all interface elements, spacing, and graphics look just like a real app or website.
- Content: Designers use real or similar-to-real content. The prototype includes most or all of the content that will appear in the final design.
- Interactivity: Prototypes are highly realistic in their interactions.
Pros
- Meaningful feedback during usability testing. High fidelity prototypes often look like real products to users. This means that during usability testing sessions, test participants will be more likely to behave naturally — as if they were interacting with the real product.
- Testability of specific UI elements or interactions. With hi-fi interactivity, it’s possible to test graphical elements like affordance or specific interactions, such as animated transitions and microinteractions.
- Easy buy-in from clients and stakeholders. This type of prototype is also good for demonstrations to stakeholders. It gives clients and potential investors a clear idea of how a product is supposed to work. An excellent high fidelity prototype gets people excited about your design in ways a lo-fi, bare-bones prototype can’t.
Cons
- Higher costs. In comparison with low fidelity prototypes, creating high fidelity prototypes implies higher costs, both temporal and financial.
Popular techniques
A digital prototype created using a special tool
Digital prototypes are the most common form of hi-fi prototyping. Nowadays, the variety of specialized software allows designers to create visually rich, powerful prototypes full of interactive effects and complex animations.
A high-fidelity interactive prototype. GIF by Adobe XD.The benefits of using this technique include:
- Optimization for devices. Specialized software allows designers to preview a prototype in a web browser or on any desktop or mobile device. This helps UX and UI designers achieve optimal layouts on different types of devices.
- Less clarification during usability testing. High fidelity interactivity frees the designer from having to clarify concepts during testing, allowing the designer to focus on observation instead.
- Smooth design handoff. Modern prototyping tools allow inspecting design. So developers will be able to get all the required information about the sizes of elements, colors and other visual properties.
Coded prototypes
A high fidelity, coded prototype is a solution that is pretty close to the ready-to-release version of a product. An example of such a prototype would be a rich interactive sandbox that allows test participants to explore a product’s different features. This type of prototyping is recommended for designers who are confident in their coding skills.
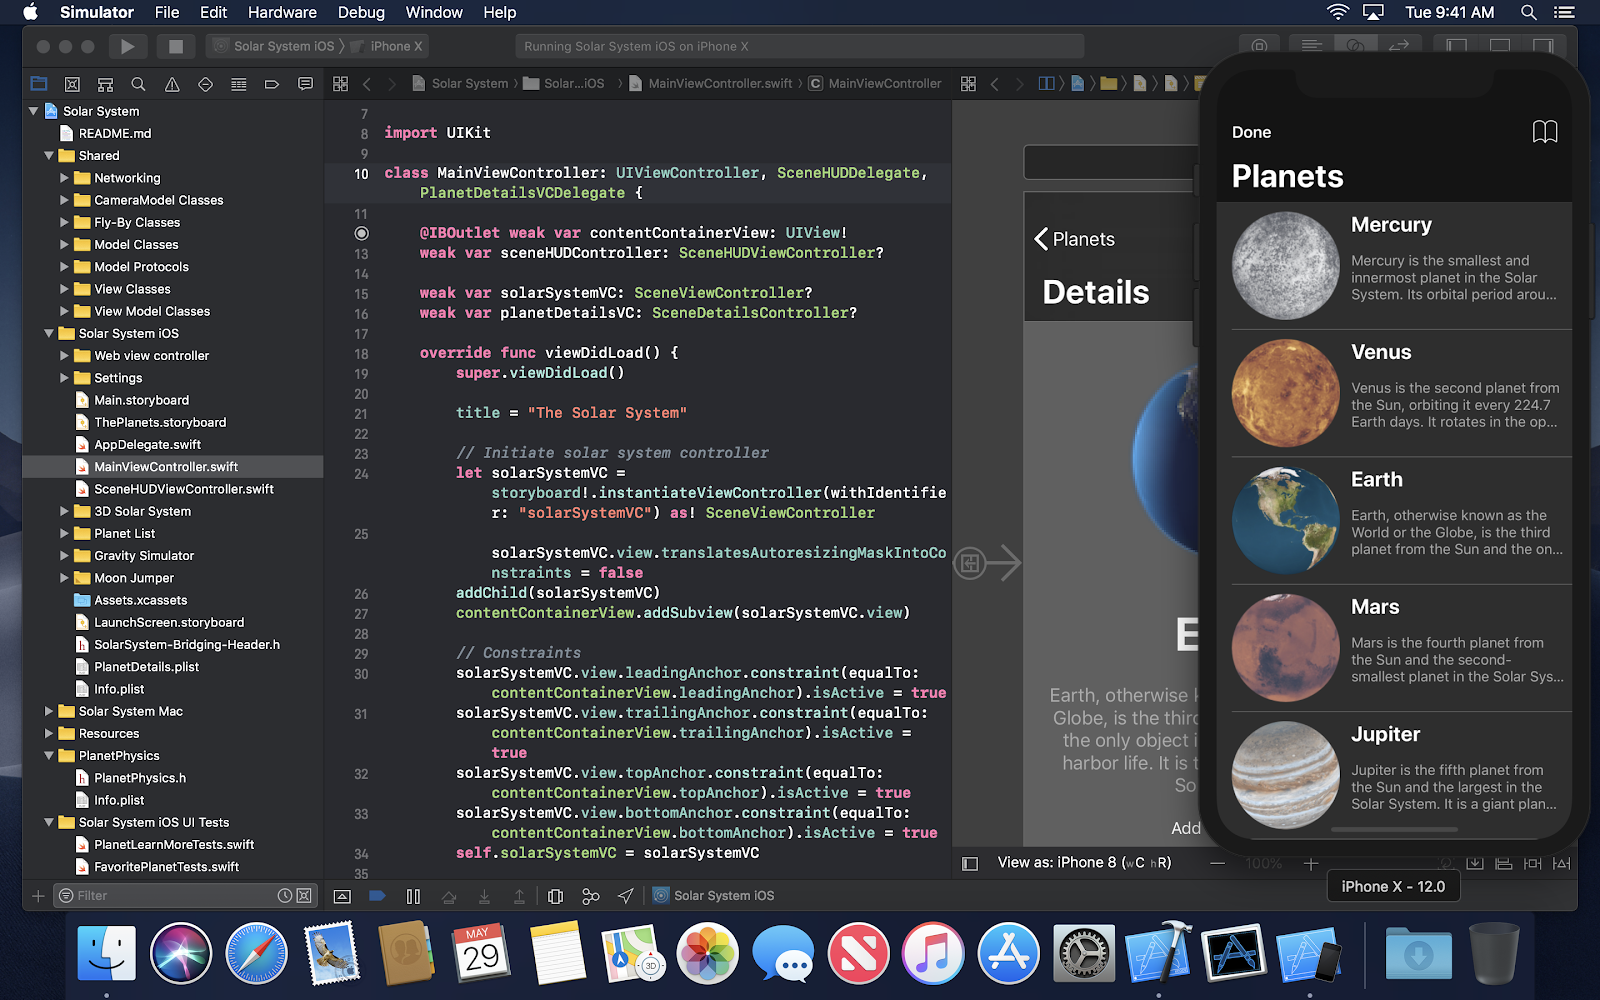 A prototype of mobile app created in Apple Xcode. Image by Apple.
The benefits of using this technique include:
- Familiarity with the platform’s constraints. Coding allows designers to understand the true capabilities and constraints of the platform they’re designing for.
- Efficiency. A coded prototype can be a good foundation for a fully-functioning app. Assuming you’re not building a one-time throwaway prototype, what you build will provide the groundwork for the final product. If it’s possible to use prototype code in the final product, you’ll save a huge amount of time and energy down the road. At the same time, it’s important to understand that prototyping is largely about speed — the goal is not to create reusable code, it’s to implement a design in a way that people can interact with as quickly as possible.
Conclusion
If delivering a good user experience is the goal of your project —and it should be — then prototyping must be a part of your UX design process. It’s crucial to choose the most effective method of prototyping — minimizing work and maximizing learning — based on your product’s needs. The end result will be overall improved design that is based on prototype testing.